Overview
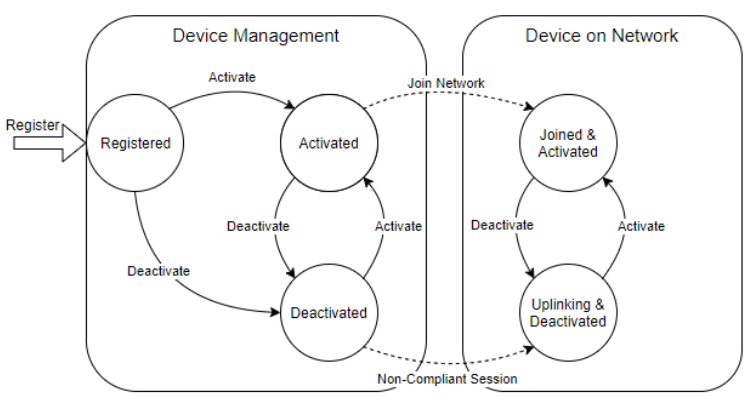
LoRaWAN uses an AES 128 CCM security model with the End Devices and the Join Server both provisioned with the End Device’s root key(s). The Join Server is used to authorize the Device and distribute session keys to the Network Server and Application Server while the End Device generates these same session keys locally. Typically, the manufacturer of Devices supporting Over-The-Air Activation (OTAA) will supply the Application Provider a manifest containing the Device EUI (DevEUI), Join Server EUI, (JoinEUI sometimes called the AppEUI) and Root Key(s) (LoRa v1.0 AppKey, LoRa v1.1 NwkKey and AppKey). Note, as a best practice, the JoinEUI should be specific to the Application Provider. Registration is the process of loading the DevEUI/RootKey(s) and associated meta data for each End Device on to the Join Server. The Activation process informs the network server that the Device is allowed on the network.
To activate a Device on the network it must be assigned to a Contract . This Device to Contract association establishes a billing relationship and the communications entitlement for a pool of Devices. When Contracts are established, Contract IDs are assigned by SenRa and made available to associate in the Registration and Activation processes. When a Device is Activated it transitions to a billable state.
| State | Description | Billing State |
|---|---|---|
| Registered | Device identity is uploaded to the Network Server. | Not Billable |
| Activated | Device identity is assigned to a Contract and authorized to join the network. | Billable |
| Active | Authorized Device joined the network and is communicating. | Billable |
| Deactivated and Heard | Deauthorized Device still communicating on the Network. Device is excluded from re-joining the network. | Billable |
| Deactivated and Silent | Deauthorized Device no longer communicates and is not heard by the Network Server for a complete billing period. | Not Billable |
Registration and Activation may be accomplished using the UI in the Application Provider Portal or via API with JSON. It is important to note that once a Device has been Joined to the network the Contract assigned to the Device cannot be changed. In the event a Contract was incorrectly assigned, Support can assist with changing the Contract associated with Devices.
States & Transitions
Device Fields
The table below details the purpose, expected data type and format of a Device's data fields. The table also identifies when the fields can be set in relation to the Device State Transitions described above.
- Device Contracts can only be changed when Transitioning to Deactivated or Activated.
- State Transitions cannot be repeated. Example: an Activated Device cannot be Activated.
| Field | Field Name | Description | Allowed Values | Example | Settable During |
|---|---|---|---|---|---|
| devEui | Device EUI | The IEEE EUI-64 identifier for the Device. | Hexadecimal String | FFFFFFFFFFFFFFFF | Registration |
| appKey | App Key | The Device's AES-128 root key used to derive session keys (Application Key). | Hexadecimal String | FFFFFFFFFFFFFFFFFFFFFFFFFFFFFFFF | Registration |
| devAddr | Device Address | The network identifier used for Downlink communication and Uplink MIC validation | Hexadecimal String | FFFFFFFF | Registration*** |
| nwkSKey | Network Session Key | The Device's AES-128 key used for Network-level communication. | Hexadecimal String | FFFFFFFFFFFFFFFFFFFFFFFFFFFFFFFF | Registration*** |
| appSKey | Application Session Key | The Device's AES-128 key used for Application-level communication. | Hexadecimal String | FFFFFFFFFFFFFFFFFFFFFFFFFFFFFFFF | Registration*** |
| contractId | Contract ID | The Contract Id assigned to the Devices. | Integer | 100 | Registration Activation Deactivation |
| profId | Device Profile | The Device Profile Id assigned to the Devices. | Integer | 100 | Registration Activation Deactivation Update |
| lat | Latitude | The Device's latitude in decimal degrees. | Float | -32.221 | Registration Activation** Deactivation Update |
| lng | Longitude | The Device's longitude in decimal degrees. | Float | 72.3233 | Registration Activation** Deactivation Update |
| tags | Tags | Informational tag(s) for the Device. | Comma separated list of Strings | Tag1,tag2 | Registration Activation** Deactivation Update |
| metadata | Metadata | Custom information for the Device. | String | deviceID=100; deviceNumber=10 | Registration Activation** Deactivation Update |
| devType | Device Type | The type of the Device. | String | Senet NA Mote | Registration Activation** Deactivation Update |
| devClass | Device Class | The classification of the Device, either Class A, B, or C. | CLASS_A or CLASS_B or CLASS_C | CLASS_A | Update* |
| fwVer | Firmware Version | The firmware version of the Device. | String | 10.1.2 | Update* |
* Only Devices which have Joined the Network.
** Only Devices which have not Joined the Network.
** Only Devices configured for ABP - Activation by Personalization.
Token Management (MFA)
Registration requires multi-factor authentication: an authentication token must be requested and then submitted. A token may be requested either during the registration process (see below) or directly from the Device Management table. In response to a token request, an email with a token (six-digit code) is emailed to the requesting user account. By default the token has a one-hour lifetime and a single use count, however the token lifespan can be configured as part of the request process.
An Application can have only one active token. Once consumed (use count runs out) or expired, a new one must be requested. Successful requests always replace the current token, regardless of expiration or any remaining uses.
Note
Device Activation and Device Deactivation do not require multi-factor authentication.
To get started, navigate to the Device Management table.
- Click the
 tab
tab - If there are multiple applications; from the EUI column click the application EUI to navigate to the Application Detail View. Otherwise the view will automatically be directed to the Application Detail View.
- From the Application Detail View, Navigate to the Device Management view by clicking on the
 button
From the Device Management table, select the upload  button to start the registration process.
Register Devices
A registered Device must be Activated before it can join the network.
- A Device must be registered before it can be Activated.
- The Application EUI and Join Server EUI for the Devices must be confirmed during Registration, Activation and Deactivation to verify the association for billing and accounting purposes.
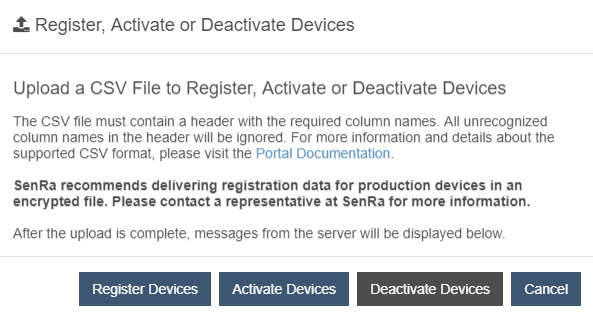
To Register Devices, select the Register action, and click the ellipsis to upload a CSV file.
Entering an Authentication Token
When the Upload File button is clicked, the following dialog allows the user to request and submit a token. When a token request is made, the settings for the token lifespan can be configured.
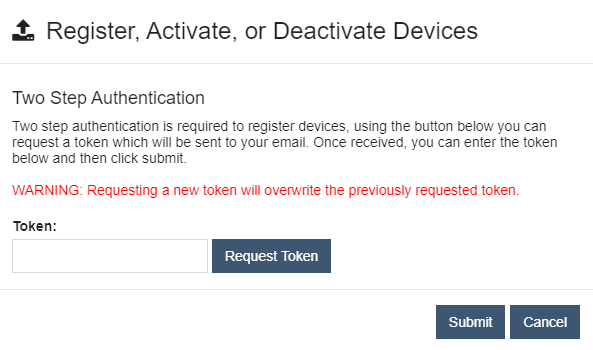
Clicking the Request Token button triggers display of the token configuration fields.
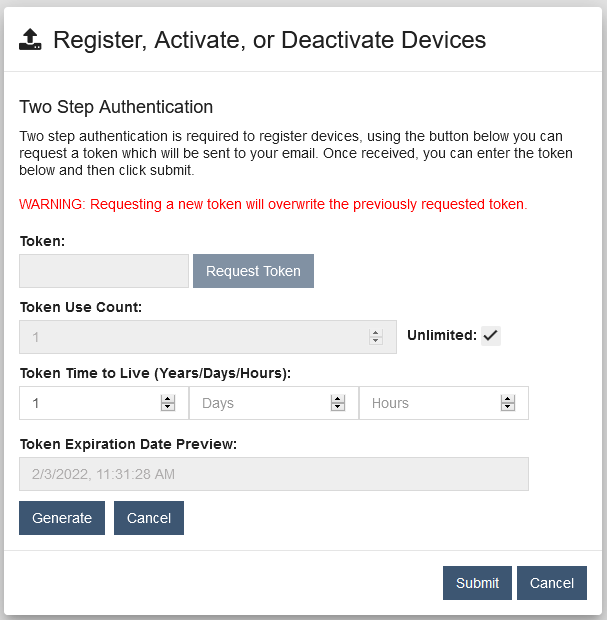
Note
If multiple users manage the same Application, token management must be coordinated.
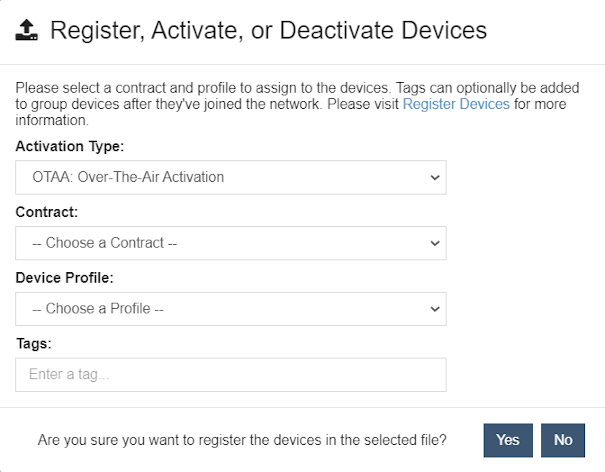
After a file is selected and a valid token supplied, a confirmation dialog appears.
During Registration the user is required to provide the Activation Type and may optionally assign both a Device Profile and Contract.
Activation Type identifies the join-method used by the Devices being registered, indicating to the Network Server the types of required and optional personalization data in the file being uploaded. The default is 'OTAA - Over The Air Activation'.
Optionally, the Device Profile and Contract may be set. If either association is unknown at the time, 'Do Not Set' may be selected as the may alternately be assigned during Activation. If no Contract or Device Profile is selected as part of either operation, the default settings for each - as configured for the Device's associated Application - are set when the Devices join the Network.
Lastly, informational tags may be applied to the Devices being registered.
Note
When the Activation Type is set to ABP, the NS will provision - as part of Registration - one or both of the session keys (nwkSKey and appSKey) for each Device if not found in the supplied CSV file.
Select Yes to proceed registering the Devices in the selected file.
Once the file's data is validated, a summary is displayed.
If the upload fails or the data is invalid, error feedback is provided.
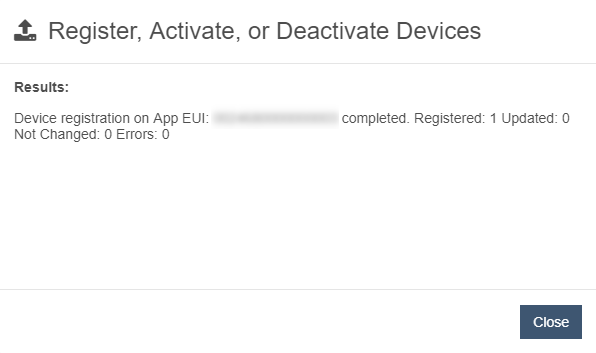
Duplicate Device registrations are specifically not allowed. Attempts to register Devices on more than one Application or Join Server will fail as shown here:

Example OTAA Registration CSV Format
####################################################
# Required Fields: devEui, appKey,
# Optional Fields: lat, lng, tags, metadata, devType
####################################################
devEui, appKey, lat, lng, tags, metadata, devType
AA11111F00000001,0B76FAB3C1A189403C145BF1FCB08647, 42.356959,-71.053271,tag1;tag2,metadata1,WATER_SENSOR
AA11111F00000002,E4FFBA476D97E00D7E38EFD6BF883A32, 42.356779,-71.065271,tag1,metadata2,WATER_SENSOR
Example ABP Registration CSV Format
####################################################
# Required Fields: devEui
# Optional Fields: devAddr,appSKey,nwkSKey,lat,lng,tags,metadata,devType
####################################################
devEui,devAddr,appSKey,nwkSKey,lat,lng,tags,metadata,devType
FFFFFFFFFFFFFFF1,FFFFFFFF,FFFFFFFFFFFFFFFFFFFFFFFFFFFFFFFF,FFFFFFFFFFFFFFFFFFFFFFFFFFFFFFFF, 42.356959,-71.053271,tag1;tag2,metadata1,WATER_SENSOR
FFFFFFFFFFFFFFF2,FFFFFFFF,FFFFFFFFFFFFFFFFFFFFFFFFFFFFFFFF,FFFFFFFFFFFFFFFFFFFFFFFFFFFFFFFF, 42.356779,-71.065271,tag1,metadata2,WATER_SENSOR
Duplicate Application Keys
Duplicate Application keys are allowed but strongly discouraged as a potential security risk. If duplicate Application keys are detected in the CSV file, the following warning is displayed:
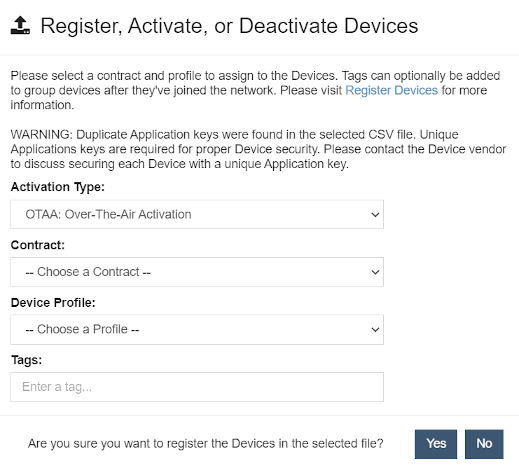
Activate Devices
An Activated Device may join the network and start uplinking. Devices in this state are not considered "Active" until they have joined the network. Once a Device has joined the network, it appears in the Devices table.
Required column names in the CSV header: devEui
Populate the devEui column with previously registered or Deactivated Device EUIs.
Select Activate in the action, and click the ellipsis to upload a CSV file of previously registered Devices.
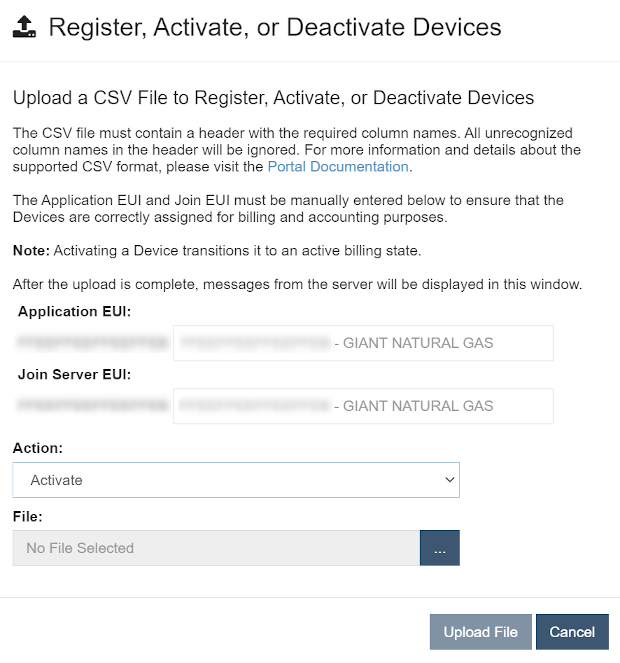
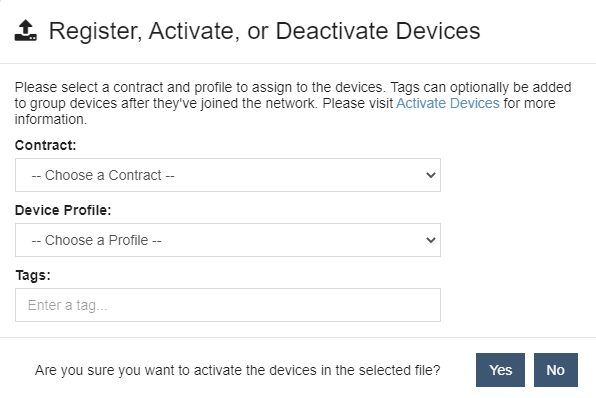
After a file is selected a confirmation dialog appears.
This dialog requires the user to choose a Contract and Device Profile for the Devices in the csv file.
Optionally, informational tags may be updated or applied to this group of Devices.
Select Yes to upload the selected file.
Note
Device Profiles and Contracts are set when a Device joins the network. Prior to joining, these values can be preselected. The value selected during activation will override the value selected during registration. If "Current or Default" is selected, the value assigned during registration will be used. If a Device was not assigned a Contract or Profile during registration, its Application's defaults will be used. After a Device joins, the Contract can be updated through deactivation.
The results of the activation are shown after the file is processed.
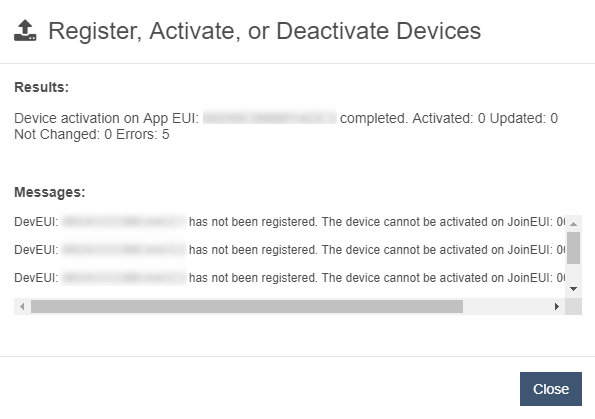
Note
If not included in the CSV at Registration, Activation for ABP Devices will provision a devAddr for each device. Since the NS may have previously provisioned the nwkSKey and appSKey parameters as part of Registration, the Activation Results dialog allows the user to export of all the devices' ABP data to CSV formatted file. The 'Export' button is available only when the Activation is completed by uploading the CSV file used for Registration.
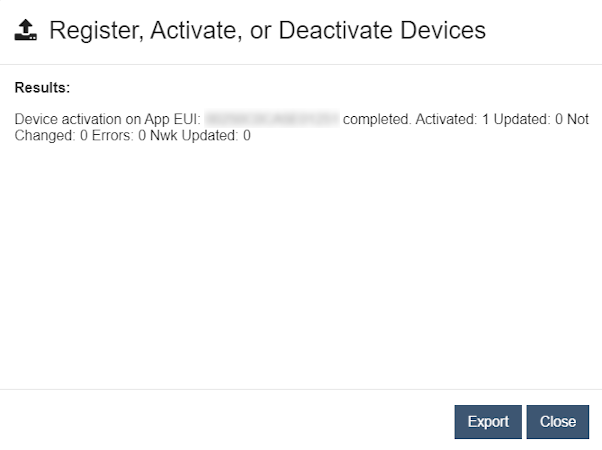
Example OTAA Activation CSV Format
####################################################
# Required Fields: devEui
# Optional Fields: lat, lng, tags, metadata, devType
####################################################
devEui, lat, lng, tags, metadata, devType
AA11111F00000001,42.356959,-71.053271,tag1;tag2,metadata1,WATER_SENSOR
AA11111F00000002,42.356779,-71.065271,tag1,metadata2,WATER_SENSOR
Example ABP Activation CSV Format
###################################################
# Required Fields: devEui
# Optional Fields: devAddr,appSKey,nwkSKey,lat,lng,tags,metadata,devType
####################################################
devEui,devAddr,appSKey,nwkSKey,lat,lng,tags,metadata,devType
FFFFFFFFFFFFFFF1,FFFFFFFF,FFFFFFFFFFFFFFFFFFFFFFFFFFFFFFFF,FFFFFFFFFFFFFFFFFFFFFFFFFFFFFFFF, 42.356959,-71.053271,tag1;tag2,metadata1,WATER_SENSOR
FFFFFFFFFFFFFFF2,FFFFFFFF,FFFFFFFFFFFFFFFFFFFFFFFFFFFFFFFF,FFFFFFFFFFFFFFFFFFFFFFFFFFFFFFFF, 42.356779,-71.065271,tag1,metadata2,WATER_SENSOR
Deactivate Devices
Once Deactivated, Devices cannot join or rejoin the network. However, a previously joined Device can continue uplinking after deactivation.
A Device must be registered before it can be Deactivated.
A Device that is administratively Deactivated but continues to communicate on the network is in an active billing state. To avoid billing for Deactivated Devices, they must not be heard by the network for the entire billing cycle.
Required column names in the CSV header: devEui
Populate the devEui column with previously Activated or registered Device EUIs.
Select Deactivate in the action, and click the ellipsis to upload a CSV file of previously registered or Activated Devices.
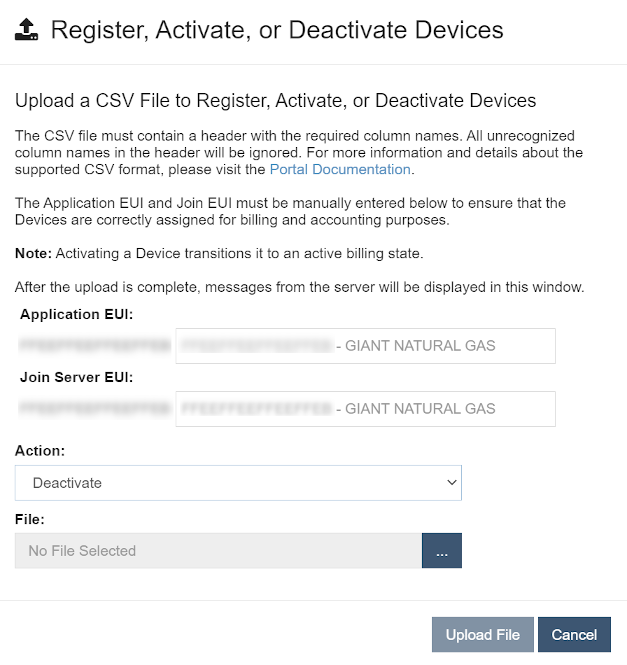
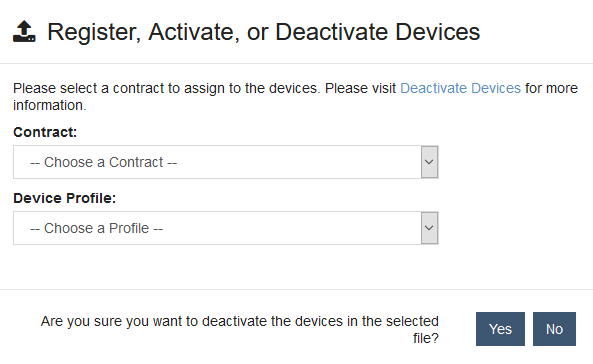
After a file is selected a confirmation dialog appears. This dialog requires the user to choose a Contract for the Devices in the csv file. The Device's current Contract can be used by selecting Current.
Note
The Contract can be updated if the Devices are Activated from the Deactivated state.
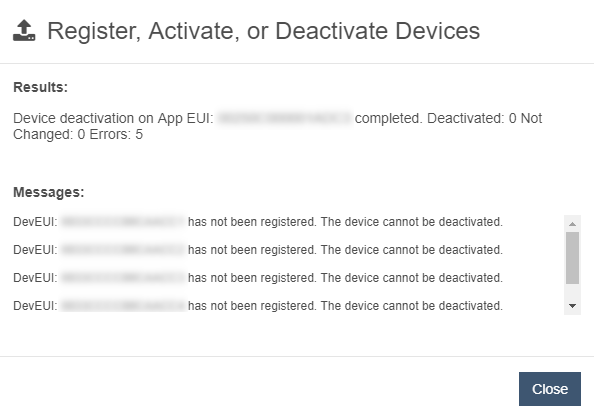
The results of the deactivation are shown after the file is processed.
Example Deactivation CSV Format
####################################################
# Required Fields: devEui
####################################################
devEui
AA11111F00000001
AA11111F00000002
Device Update
Upload a CSV file to update Device fields for all Registered and Activated Devices. The Devices' latitude, longitude, tags, metadata, devType, devClass, fwVer, appKey and nwkKey fields can be edited. From the Devices table, select the upload  button to display the window below.
Application Keys are updated from the Device Management table using the same process. Click on the  button to perform a key update.
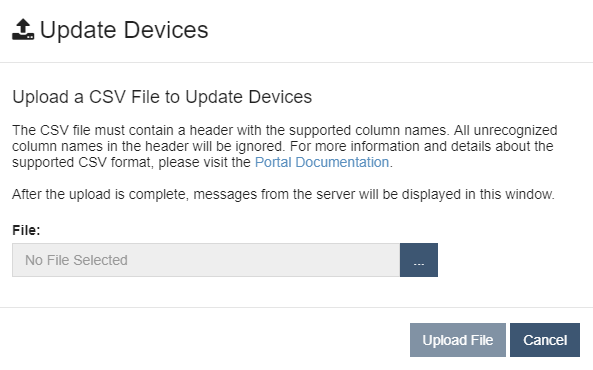
When the 
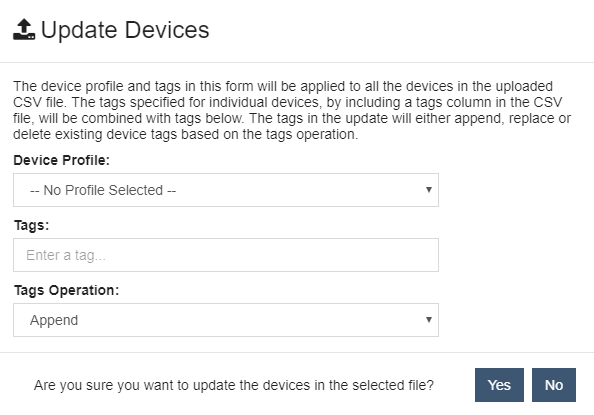
Tags in the update can append, replace or delete existing tags based on the selected operation. The tags can be specified for individual Devices using a tags column in the csv file or for the full set of Devices using the tags input. The uploaded latitude and longitude will always replace the existing Device data. Select Yes to upload the previously selected file.
If the upload succeeds and the data is valid, an upload summary and any messages from the server will be displayed. If the upload fails or the data is invalid, an error message will be displayed. Devices included in the CSV will only be skipped if they do not exist.
Example Update CSV Format
####################################################
# Required Fields: devEui
# Optional Fields: appKey,nwkKey, lat, lng, tags,
#                  metadata, devType, devClass, fwVer
####################################################
devEui, appKey, nwkKey, lat, lng, tags, metadata, devType, devClass, fwVer
AA11111F00000001,FFFFFFFFFFFFFFFFFFFFFFFFFFFFFFF1,FFFFFFFFFFFFFFFFFFFFFFFFFFFFFFF1,42.356959,-71.053271,tag1;tag2,metadata1,WATER_SENSOR,CLASS_A,1.0.20
AA11111F00000002,FFFFFFFFFFFFFFFFFFFFFFFFFFFFFFF2,FFFFFFFFFFFFFFFFFFFFFFFFFFFFFFF2,42.356779,-71.065271,tag1,metadata2,WATER_SENSOR,CLASS_B,2.1.2
Note
The appKey and nwkKey field values are 32 character hexadecimal values used to secure Device communication: they should be both distinct and uniquely defined for each Device. The values shown above should not be used; they are are provided as examples only.
Transferring Devices
Devices can be transferred between Join Servers and Accounts. These functions are accessed by clicking on the  button in the Device Management view and selecting the desired type from the menu. The option to transfer a Device between Join Servers is only enabled if there are multiple Join Servers associated with the Application.
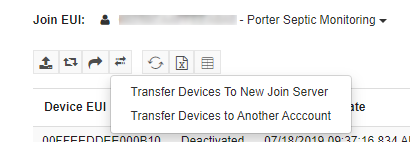
Transferring Devices Between Join Servers
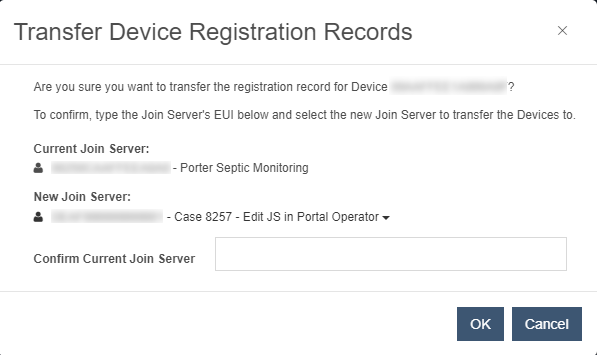
Selecting the option to Transfer Devices to New Join Server launches a dialog that displays the current Join Server and a dropdown containing all Join Servers currently associated with the Application. Select the desired destination Join Server, enter the EUI of the current Join Server to confirm the transfer and press the OK button to continue. If the operation is successful, the Device should appear in the Device Management table of the destination Join Server.
Transferring Devices Between Accounts
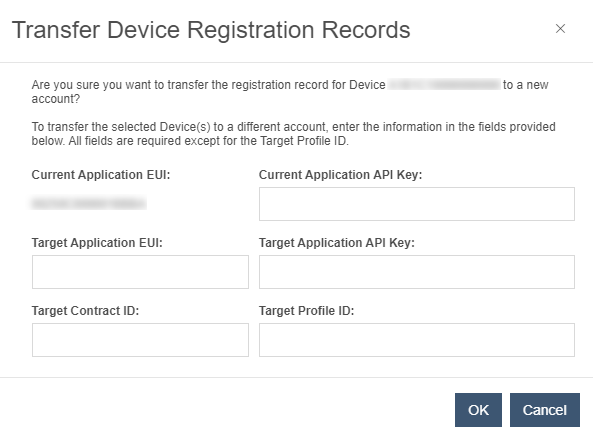
Selecting the option to Transfer Devices to Another Account launches a dialog containing multiple several fields that are filled in to complete the transfer. These include:
- Current Application API Key (Required)
- Target Application EUI (Required)
- Target Application API Key (Required)
- Target Contract ID (Required)
- Target Profile ID (Optional)
If several Devices are selected for transfer, the operation may take some time to complete. When the dialog is opened while an ongoing transfer operation is in progress, a progress bar is shown with the current status.

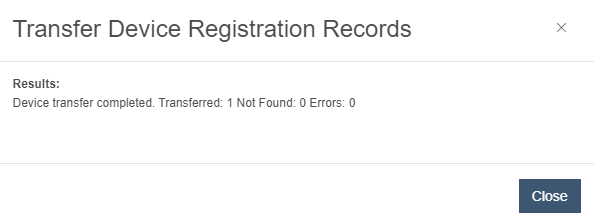
Once the transfer completes, the dialog will show the final status.
Adding a Device to an Unknown or Unregistered Join Server
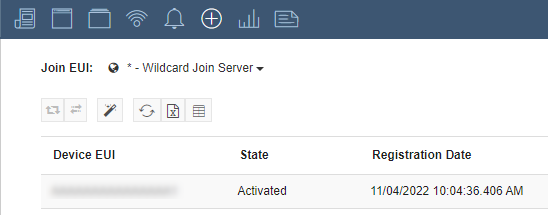
Occasionally it may be necessary to Register a single Device with a Join Server that has not been Registered. Such Devices can be added by selecting the Wildcard Join Server from the dropdown in the Device Management view.
- Click the
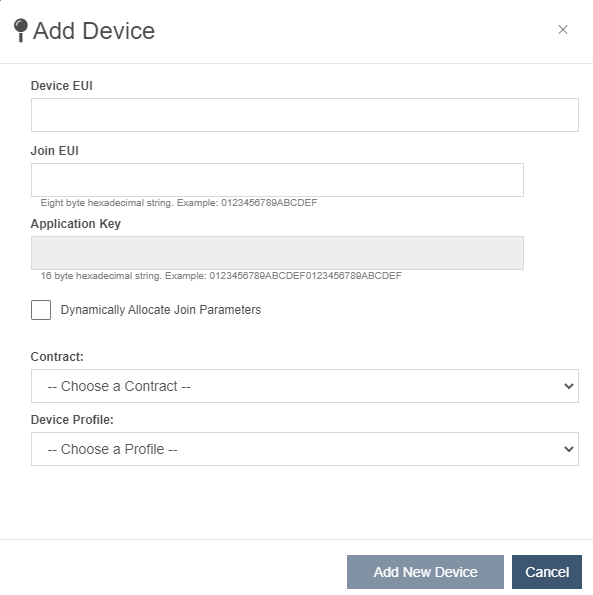
 button to launch the Add Device dialog.
 - Enter the required Device Registration information including Device EUI, Application Key, Contract, Device Profile, and Join EUI or * if the Join EUI is not known.
- Click the Add New Device button to save the information and add the Device.
Once the information is entered and saved, the Device should appear in the Wildcard Join Server's list of Devices.
Firmware Update Over The Air (FUOTA)
Device Requirements
- Implementation of LoRaWAN FUOTA Ver 1.0.0 or 2.0.0 as specified by the LoRa-Alliance's FUOTA Working Group.
- The ability to transition from Class A mode to either Class C or B multicast operation and back again to Class A.
- Functionality to manage the additional power consumption associated with large data transport operations.
- OS-level primitives and on-board memory to support receiving and storing the update file.
- A methodology for replacing some or all of its running image
Note
Reference implementations are available from Stackforce and Arm Mbed.
Responsibilities
- LoRaWAN and Regulatory (FCC, ETSI, etc) certification may be impacted by a firmware update.
- Device vendors must work with their radio-module manufacturers to determine support for the FUOTA protocol layers and whether the radio module itself can be updated by either the host processor or the application stack running on the module. Requirements may be simpler if updates only involve a configuration file rather than an entire (or partial) firmware image.
- Application Providers must have a methodology for identifying Devices that fail an update.
Pre-Requisites
- A list of Devices to update
- A full firmware update or patch file to distribute
- A 4-byte descriptor value of the file (described in LoRaWAN Fragmented Data Block Transport Specification v1.0.0)
Process
-
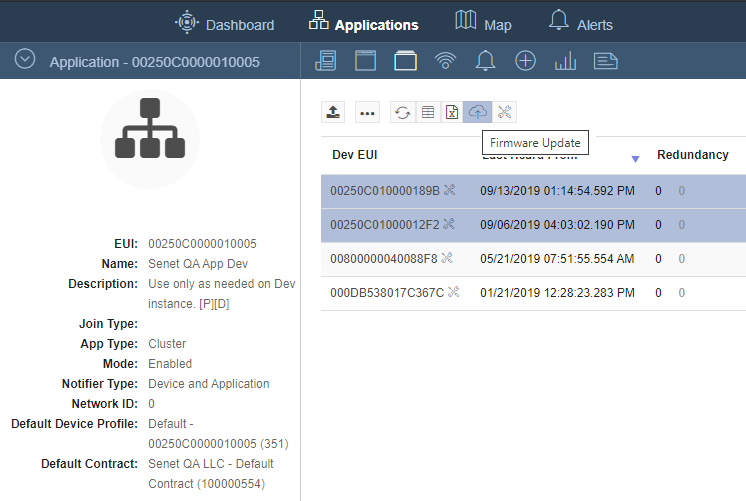
From the Devices table within the Application Details view, select one or more rows of Devices to update, then click the 'Firmware Update' button:
-
Once the 'Update Devices' dialog launches, fill-in the form to set the image-transfer parameters. Each field is described below.
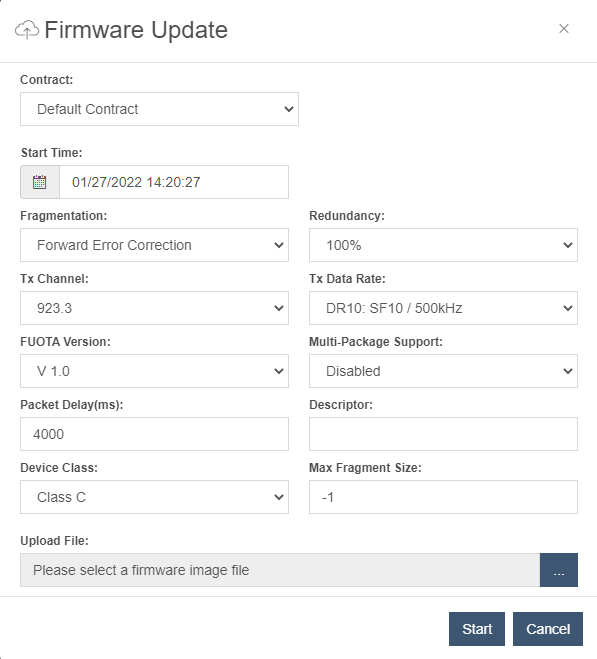
Contract: The selected Contract determines how the Customer is billed by SenRa for the FUOTA events.
Start Time: The time scheduled to initialize the firmware update. A minimum of 3 successful downlinks are required to set up the multicast group. This time must accommodate the largest uplink interval among the group's Devices as well as consider potential packet loss.
Note
The progression of multicast setup downlinks [McGroupSetup --> McGroupCSess --> FragSessSetup] will not proceed until all corresponding answer uplinks are received.
      Nwk  -- McGroupSetupReq  --> Dev
      Nwk <-- McGroupSetupAns  --  Dev
      Nwk  -- McGroupCSessReq  --> Dev
      Nwk <-- McGroupCSessAns  --  Dev
      Nwk  -- FragSessSetupReq --> Dev
      Nwk <-- FragSessSetupAns --  Dev
Fragmentation: Currently supported methods used to fragment the file:
-
Forward Error Correction: As defined by the FUOTA specification.
-
Retransmit: The entire file is transmitted multiple times.
Redundancy: Per the Fragmentation method selected:
-
Forward Error Correction: Redundancy is the percent of additional frames transmitted based on the frame count required to transmit the file once. For example, a redundancy of 30% for 100 frames would generate a total packet count of 130.
-
Retransmits: Redundancy is the total number of times the file will be sent. For example, a redundancy of 1 for a 100 frames would generate a total packet count of 200.
Tx Channel: Channel frequency that the file will be multicast on. Should only be modified in response to local interference on the default channel.
Tx Data Rate: Data Rate that the file will be multicast at. May be modified to adjust time on air or increase the probability of success.
FUOTA Version: The FUOTA version implemented by the targeted group of Devices. Versions 1.0.0 and 2.0.0 are incompatible.
Multi-Package Support: This may be set to 'Enabled' if the targeted Devices support the LoRaWAN Multi Package Access Protocol as defined by LoRa-Alliance's FUOTA Working Group.
Packet Delay (ms): The minimum delay allowed between transmission of the data fragment packets. Any modifications required due to regional duty-cycle restrictions will be handled by the Network.
Descriptor: The 4-byte value provided to the multicast group in the FragSessSetupReq that identifies the file to be sent.
Device Class: The Class-mode - either Class B or C - the targeted Devices will transition to in order to receive the file, based on their implementation(s).
Max Fragment Size: The maximum fragment size allow for transmit. This setting should accommodate Devices with fragment size limitations. When set to -1, the LNS sets this value to the maximum downlink size allowed for the region.
Upload File: The binary file to be multicast to the targeted Device group, using the above parameters.
-
-
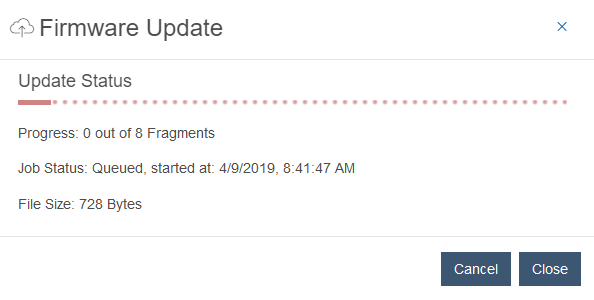
While the Device sessions are initializing, a 'Job Status: Queued' indicates when the Firmware Update is targeted to begin:
-
Application commands are sent to setup the multicast and fragmentation sessions with the Devices:


-
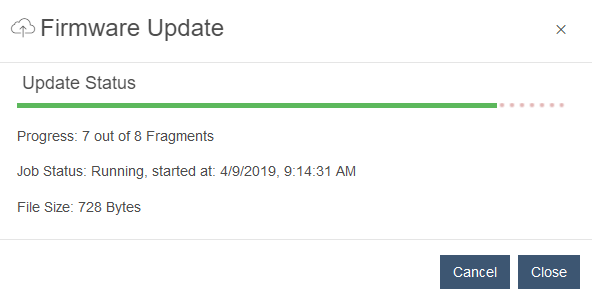
The Status of the Firmware Update is updated as Fragments are sent:
-
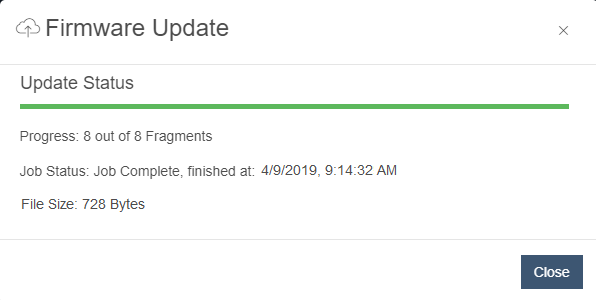
Once all Fragments are sent, the Update status reflects the completed Firmware Update:
